Chinese Tools Manufacturer,DNT® Professional Automotive Tools&Hand Tools

Home / All / Services /

Test For Leaks In Cooling System

Test For Leaks In Cooling System

Update Time:2023/8/16
Master Radiator Pressure Test Kit
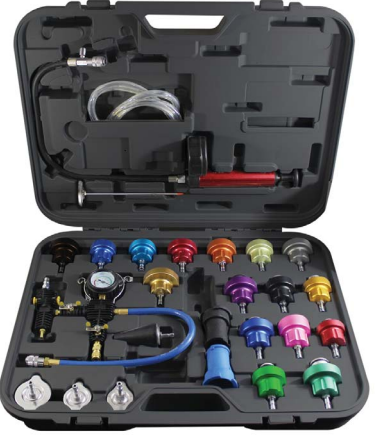
 Detects and exposes external system leaks
• Detects internal engine leaks due to blown gaskets or cracked block
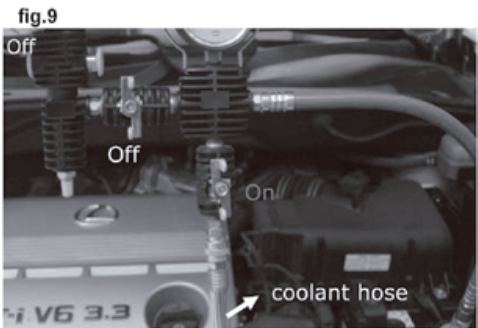
• Vacuum type cooling system
• Purge and refill for quick change of coolant
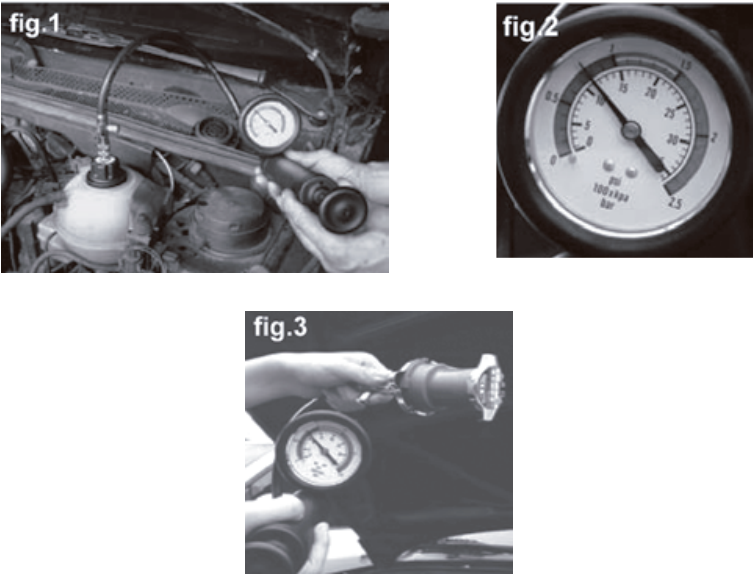
• Test Range: 0 – 35 psi
• Includes 1 blue radiator cap test connector R123/R125
• Includes 1 black radiator cap test connector R123/R124
• Includes 1 thermometer, 1 universal radiator cap, 1 vacuum purge and refill tool, coolant hose and additional 
installation accessories
• Includes hand pump and 19 adapters (No.’s 2, 3, 4, 6, 7, 8, 9, 10, 11, 12, 13, 14, 15, 16, 17, 19, 21, 22 and 23) to fit 
most popular domestic and import cars and trucks
Test For Leaks In Cooling System
• Step 1: Remove the original radiator cap after assuring that the 
 cooling system is depressurized and cool.
• Step 2: Choose the correct radiator cap for the vehicle being 
 tested from the test kit and install on cooling system opening.
• Step 3: Remove the hand pump assembly from the test kit and 
 fasten the quick coupler at the end of the hose to the radiator 
 cap securely.
 Operate the hand pump until reaching the pressure recommended by the vehicle manufacturer. (See fig. 1 & 2) DO 
 NOT exceed vehicle manufacturer’s recommended pressure or 
 maximum gauge range pressure of 35psi (2.5bar). 
• Step 4: Check the pressure reading on the gauge immediately  after reaching the vehicle manufacturer's recommended  pressure. If the pressure reading drops, there is a leak in the cooling system. After pressure testing is completed, press the release button on the quick coupler until the reading on the gauge reads 0. Remove quick coupler from radiator cap and then  remove radiator cap from the cooling system opening. Locate  the leak and repair as necessary.
Test For Leaks In Original Radiator Cap 
Step 1: Choose the correct radiator cap connector (02A or 02B)  and correct steel radiator cap (03, 04, or 05) for the correct vehicle being tested from the test kit. Fasten the original radiator cap to  the radiator cap connector and then fasten the steel radiator cap from the test kit to the other end of the radiator cap connector. 
• Step 2: Remove the hand pump assembly from the test kit and fasten the quick coupler at the end of the hose to the radiator cap securely. Operate the hand pump until reaching the pressure recommended by the vehicle manufacturer. (See fig. 3) Do not exceed vehicle manufacturer's recommended pressure or  maximum gauge range pressure of 35psi (2.5bar).
• Step 3: Check the pressure reading on the gauge immediately after reaching the vehicle manufacturer’s recommended pressure.  If the pressure drops, there is a leak in the radiator cap. After pressure testing is completed, press the release button on the quick coupler until the reading on the gauge reads 0. Remove quick coupler from radiator cap and then remove the original radiator cap from the radiator cap connector. Discard original radiator cap and replace with new cap if leaking or if it does not meet vehicle manufacturer’s recommendations.
Purge Cooling System
 Step 1: Drain coolant from radiator as well as possible.
 Step 2: Remove the purge and refill tool from the test kit and hang the tool in a convenient location under the hood with the hook provided.
• Step 3: Choose the correct radiator cap for the vehicle being tested, or the universal rubber radiator adapter from the test kit and install the one of your choice on the cooling system opening. Fasten the quick coupler at the end of the hose on the purge and refill tool to the radiator cap securely. (See fig. 4 & 5)
• Step 4: Turn valve No. 3 to the open position and valve No. 6 to the closed position. (See fig. 6)
• Step 5: Connect air supply to the purge and refill tool and press operating button until the pressure reaches 20-25 Hg (50-60cmHg). Turn valve No. 3 to the closed position and release the operating button. (See fig. 7 & 8)
Refill Cooling System
• Step 1: Connect the coolant hose to the purge and refill tool and submerge in coolant. 
• Step 2: Assure that valve No. 3 is in the closed position and that there is coolant in the coolant hose. 
• Step 3: Turn valve No. 6 to the open position to allow the coolant to refill the cooling system. 
• Step 4: The refill is complete when the gauge reads 0.
Note: Please check the coolant level and add coolant as necessary to the proper level

Are you looking for a reliable manufacturer of down home textile products?

We can quickly provide customers with market analysis, technical support and customized services.