- Ningbo Dongning Tools Co.,Ltd
- Professional Chinese Tools manufacturer on automotive speciality tools,bearing puller&heavy truck tools
- Address
- No.6 Falan Rd,Hengjie Town,Ningbo City,Zhejiang,China
- Phone
- +86-574-87216625
- info@nbdntools.com

|
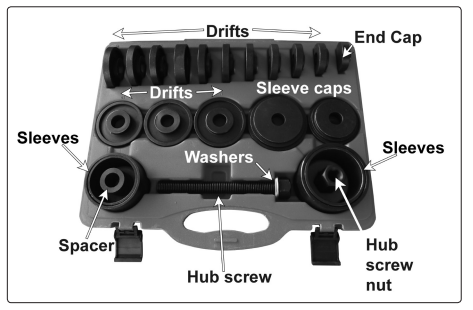
Model No:
|
DN-D1023
|
|
Drift Sizes Ø:
|
55, 60, 64, 67, 73, 75, 78, 82, 84, 88mm
|
|
End Cap Ø:
|
50mm
|
|
Sleeve Ø External:
|
76, 86, 92, 101mm
|
Hub screw length: | 210mm |
Hub screw drive: | 32, 38mm |