- Ningbo Dongning Tools Co.,Ltd
- Professional Chinese Tools manufacturer on automotive speciality tools,bearing puller&heavy truck tools
- Address
- No.6 Falan Rd,Hengjie Town,Ningbo City,Zhejiang,China
- Phone
- +86-574-87216625
- info@nbdntools.com

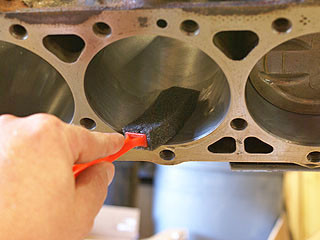
1.Oiling The Cylinder Walls:
I wiped the cylinder wall with a clean paper towel and brake cleaner (to remove the oil I applied after cleaning the block, and all the dust that has accumulated since).
Then I used a small foam paint brush to apply motor oil to the cylinder wall.
Actually, the lubricant I used was about 2/3 motor oil (5W-30 for this GM engine) and 1/3 Lucas Oil Stabilizer.
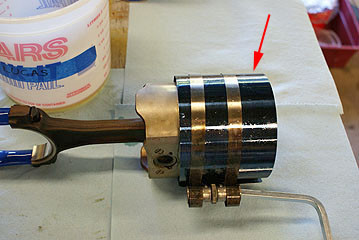
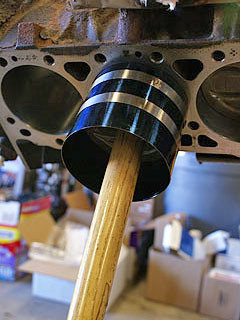
2.Oiling The Piston:
I dipped the top of the piston in my oil/Lucas blend.
This is necessary so the piston will slide through the piston ring compressor and into the cylinder.

Then I placed the top of the piston in the piston ring compressor as shown. Note that the wide section of the dark blue steel band (red arrow) goes away from the piston.
The narrow part of the band goes against the engine block when the piston is installed. After tightening, the band has a slight taper, with the narrow diameter at the end with the narrow blue band.
I tightened the ratcheting key with the supplied L-shaped tool.
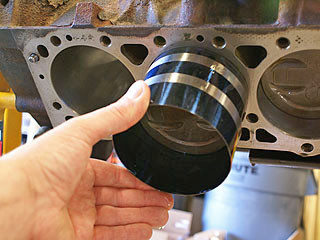
I inserted the connecting rod into the cylinder and held the piston ring compressor tightly against the engine block.
Note that the crankshaft was turned so the rod journal was at Bottom Dead Center, which means that the crank is as far away as possible from the piston.
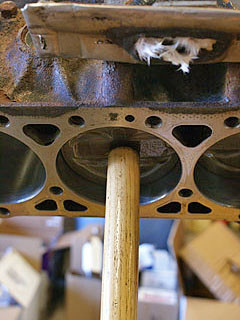
3.Pushing The Piston Into The Cylinder:
I used the handle of a large hammer to tap the piston into the engine block.
Once the piston was fully inside the cylinder, I removed the piston ring compressor and continued tapping the piston into the block.
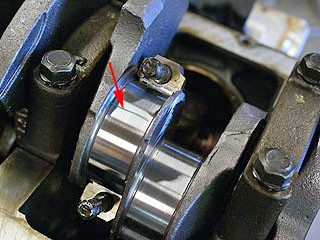
I guided the connecting rod (red arrow) until I could position it so the rubber boots were on opposite sides of the crank journal.
I tapped the piston until the connecting rod had fully seated itself onto the crankshaft journal.
Then I removed the plastic booty things.

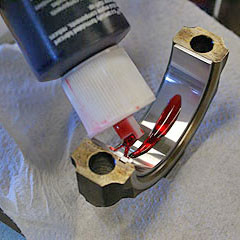
I placed a small piece of Plastigage (arrow) on the rod journal.
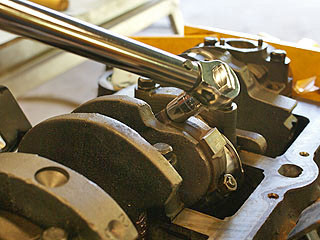
I installed the rod cap and tightened it to the required torque.
For this engine (1999 GM 4.3 V6) the torque spec is 20 foot-pounds AND THEN and additional 70 degrees of tightening.
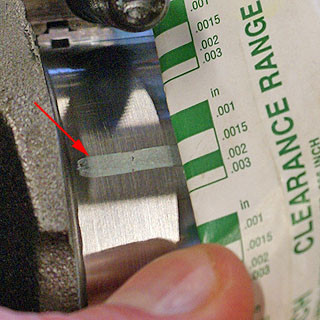
Then I removed the connecting rod cap and compared the squashed Plastigage to the scale on the package.
The scale indicates about .0015 inches of clearance between the bearing and journal (that's fifteen ten-thousandths of an inch). My Haynes book says that acceptable clearance is from .0013" to .0035", so I'm very close to the low (desirable) end of the range of acceptable oil clearance.
I cleaned off the Plastigage with a paper towel and brake cleaner.
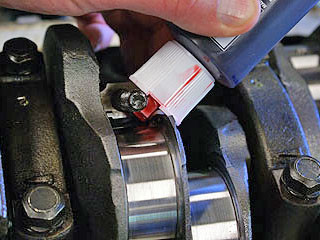
I applied a dab of assembly lube to the rod cap.
And I also applied some assembly lube to the journal beneath the connecting rod. To get a little space underneath the crank journal, I rotated the crankshaft a few degrees to slide the piston down, then I turned the crank back so there was a gap between the connecting rod and the journal. Then I dripped some assembly lube into the gap. I also applied some lube to the bare part of the journal.
Then I installed the rod cap and tightened it to 20 foot-pounds. I'm not going to do the final torqueing until all the pistons are installed (and when I've bought a tool to measure degrees of rotation of my ratchet wrench).
After installing each piston, I rotated the crankshaft a few turns to spread the assembly lube around.
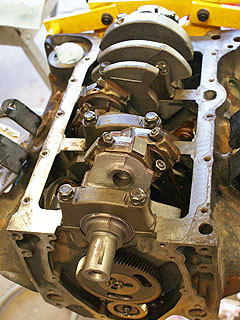
The bottom of the engine after all 6 pistons had been installed.
At this point the connecting rod nuts had only been tightened to 20 foot-pounds... I had not yet tightened them the additional 70 degrees that is required.