Instructions for slide hammer and puller set-DNT Tools
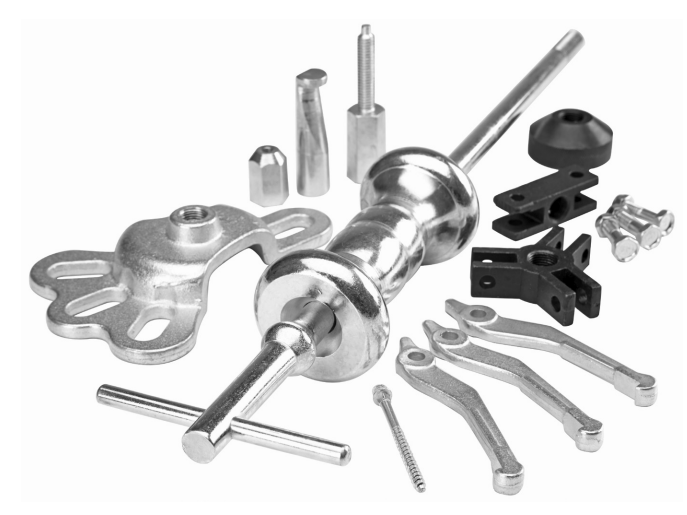
slide hammer puller set
|
Part
|
Description
|
QTY | Parts | Description |
QTY
|
|
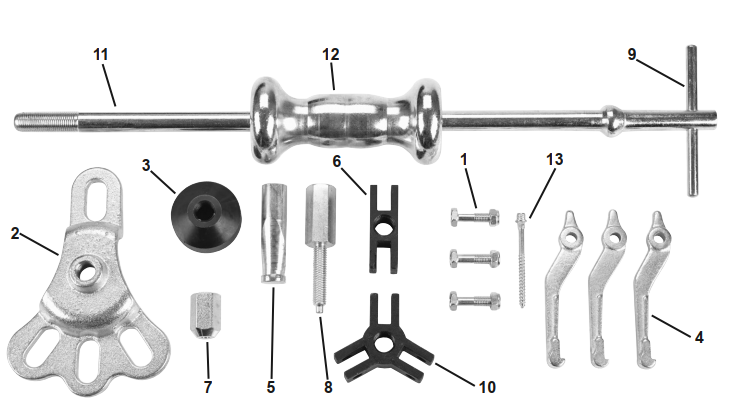
1
|
Bolt and Nut Set (M8 x 1.25) |
3 | 8 | Bolt Adapter(M12*1.75) |
1
|
|
2
|
Rear Axle Puller |
1 | 9 | Handle Cross Bar |
1
|
|
3
|
Lock Nut
|
1 | 10 | 3-Jaw Puller Adapter |
1
|
|
4
|
Jaw
|
3 | 11 | Spindle |
1
|
5 | Puller Hook | 1 | 12 | Slide Hammer | 1 |
6 | 2 jaw Puller Adapter | 1 | 13 | Screw | 1 |
7 | Dent Puller Adapter | 1 | 14 | Carrying Case | 1 |
|
Hammer Weight |
5 lb
|
|
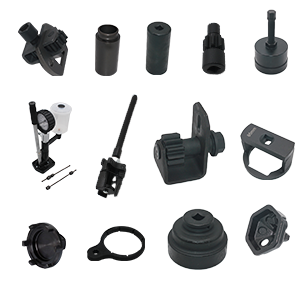
Functions |
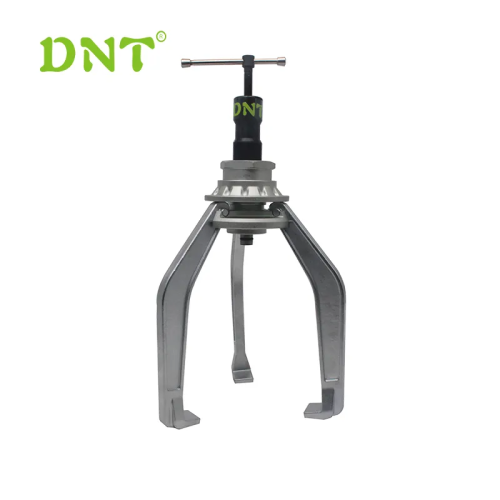
Internal or external 3-jaw puller
|
|
Internal or external 2-jaw puller
|
|
|
Puller hook |
|
|
Rear axle puller |
|
Threaded Puller/Wrench Adapter | |
Dent puller |
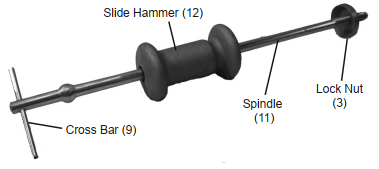
Assembly
1. Slide the plain end of the Slide Hammer (12) onto Spindle (11).
2. Thread Lock Nut (3) onto threaded end of Spindle (11), hollow side first. It serves as a Hammer Stop for the forward motion of the
Slide Hammer (12).
3. Insert Cross Bar (9) into eyelet at the end of the Spindle.
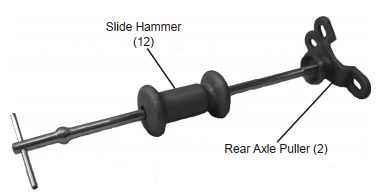
Pulling Operation (Hub/Axle/Drum)
1.Raise the vehicle according to its service instructions. Safely support the vehicle on lift or jack stands (not included).
2. Remove the wheel and tire and any nuts, bolts or accessories (such as brake calipers) that may get in the way of removing the Hub/Axle/Drum.
3. Bolt the Rear Axle Puller (2) onto the Hub/Axle/Drum using the original lug nuts. If your vehicle has a four-bolt Hub,match the Rear Axle Puller to two axle bolts. If it has a five-bolt Hub, match to three axle bolts. Tighten the lug nuts.
4.Thread the Spindle into the Rear Axle Puller hub until its non-threaded end exits the hub. Turn the Lock Nut (3) forward until it seats against the Rear Axle Puller hub and hand tighten.
5.Push the Slide Hammer towards the work piece, and then forcefully pull it back towards the cross bar end.Repeat and adjust force as needed.
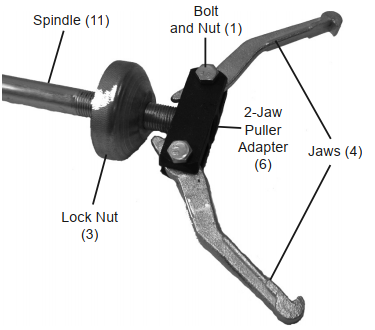
External Grip Jaw Operation
1.Use the Bolts and Nuts to attach the Jaws to the 2 or 3 Jaw Puller Adapters (6/10), as needed.Thread the adapter onto the
Spindle until non-threaded end of the Spindle exits the Adapter
Note: To grip the work piece externally,claws of the Jaws should be facing inward, as shown right.
2.Clamp the Jaws onto the object to bepulled. Turn Lock Nut (3) clockwise against the end of the Jaws, forcing them closed, causing the claws to be pushed inward against the work piece. Tighten the Bolts and Nuts firmly.
3. Push the Slide Hammer towards the work piece, and then forcefully pull it back towards the cross bar end. Repeat and adjust force as needed.
Internal Grip Jaw Operation
1.To use Jaws to grip an object from the inside, thread the Lock Nut onto the spindle with the conical side first.
2. Use the Bolts and Nuts to attach the Jaws to the 2 or 3 Jaw Puller
Adapters (6/10), as needed. Thread the adapter onto the
Spindle until non-threaded end of the Spindle exits the Adapter.
3. Back-off the Lock Nut (3) to permit the jaws to be attached to the workpiece. Turn the Lock Not forward, causing the claws to expand and grip the work piece firmly. Tighten the fasteners.
4. Push the Slide Hammer towards the work piece, and then forcefully pull it back towards the cross bar end. Repeat and adjust force as needed
Note: To grip the work piece internally, claws of the Jaws should be facing outward.

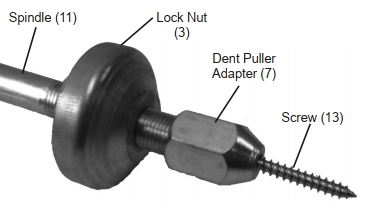
Operation (Dent Pulling)
1. Drill a 1/8" hole into the center of the dent.
2. Place the Screw (13) through the Dent Puller Adapter (7). See Figure right.
3. Thread the Screw into the drilled hole using a #2 Phillips screwdriver.
4. Thread the Spindle into the Dent Puller Adapter.Thread the Lock Nut (3) against the Dent Puller Adapter and hand tighten.
5. Push the Slide Hammer towards the work piece, and then forcefully pull it back towards the cross bar end. Repeat and adjust force as needed.
CAUTION! Do not use excessive force when pulling dents.Sheet metal can easily bend or tear.
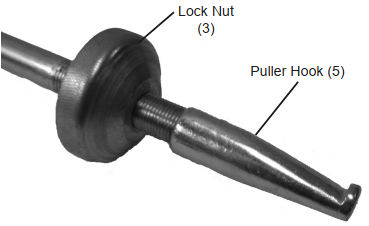
Operation (Hook/Thread Pulling)
1. Identify the lip area you will be inserting the Puller Hook (5) into.
2. Thread the Puller Hook onto the end of the Spindle. See follow left Figure. Lock Nut (3) Puller Hook (5)
3. Place the Puller Hook tip onto the edge of the lip of object to be pulled.
4. Push the Slide Hammer toward the object to be pulled. Gently pull the Slide Hammer toward the Handle Cross Bar.
5. Repeat Step 4 until object has been pulled out.
6. Use the Bolt Adapter (8) for larger cross sections, thicker sheet metal, and concentrated deep dents. See follow right Figure.Lock Nut(3)Bolt Adapter (8)
7. Follow the Steps 1-5 until threaded object has been pulled out.