


- Ningbo Dongning Tools Co.,Ltd
- Professional Chinese Tools manufacturer on hand tools& automotive tools
- Address
- No.6 Falan Rd,Hengjie Town,Ningbo City,Zhejiang,China
- Phone
- +86-574-87216625
- info@nbdntools.com

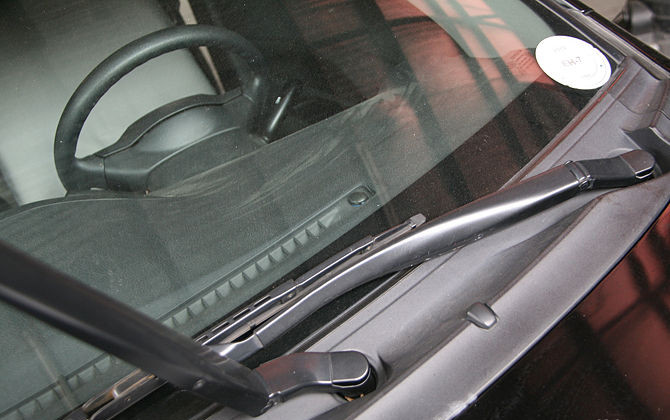
Sure, you know how to "refill" wiper blades or change over to a winter blade for the season, but how do you remove the entire wiper assembly or arm if it is bent or stripped and no longer moves across the windshield? Whether you have a bolt-on, clip-on or even some other type, keep reading. You'll be done in no time.
Steps
1.Note where the blade rests on the cowling or windshield with a small mark (bar soap, wax, etc) if the wiper arm is not loose on the drive post, otherwise skip to next step.
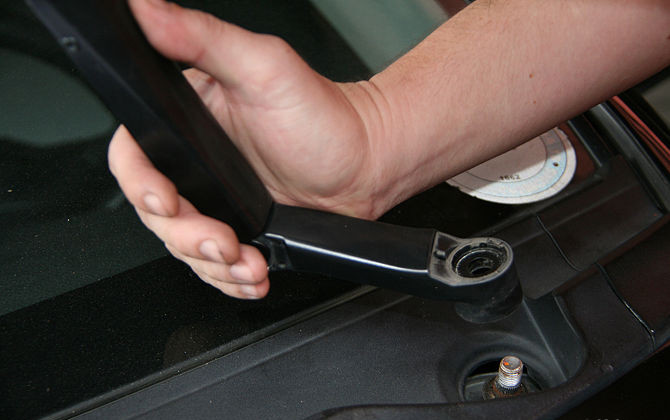
2.For the bolt on type:
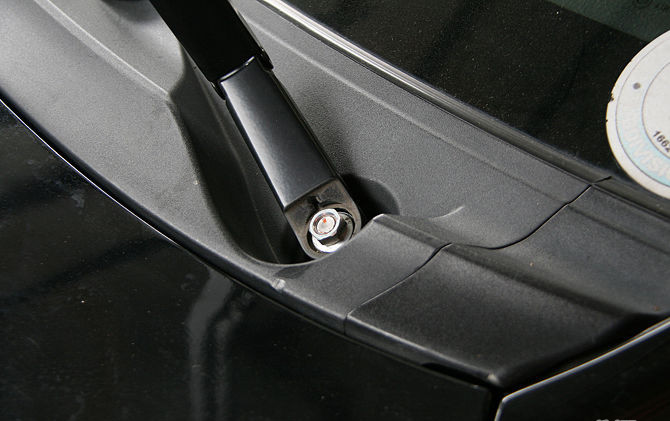
Follow the wiper arm away from the wiper blade to it's base or point of attachment. This may require that the hood be opened.
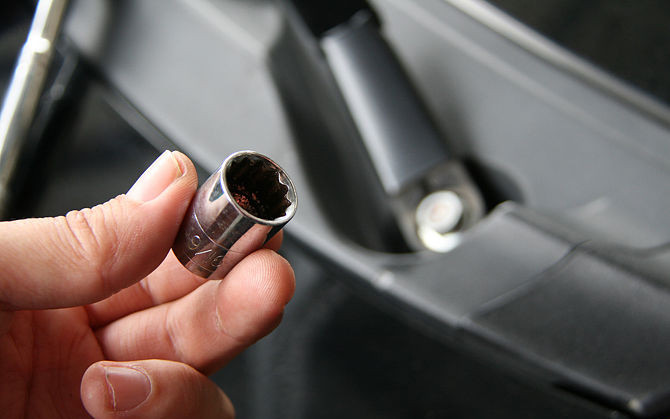
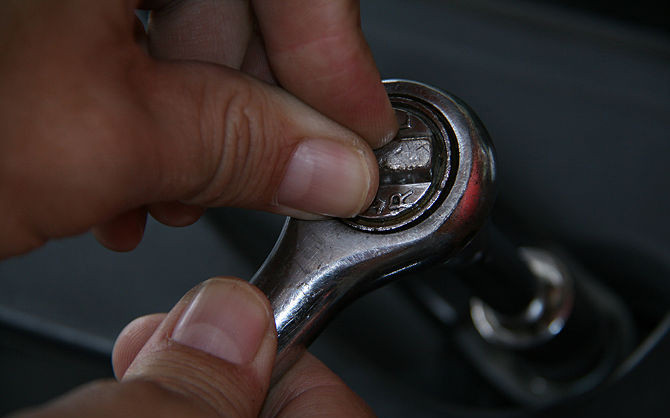
Select a socket sized to fit the hex nut, and place on the ratchet (or extension if needed).
Position yourself for the best access to the hex nut (from under hood or over the windshield).
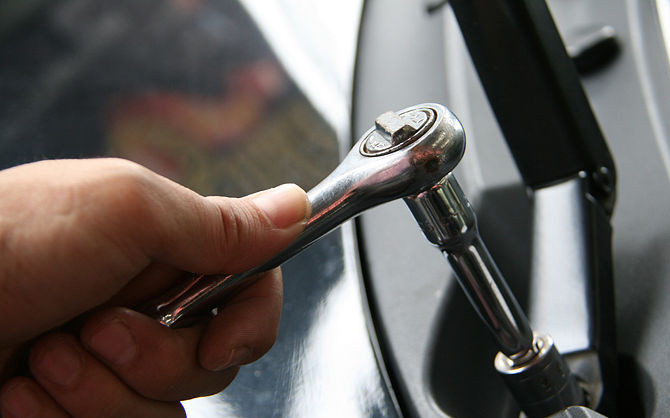
Set the ratchet to allow it to spin the hex nut in a CCW direction.
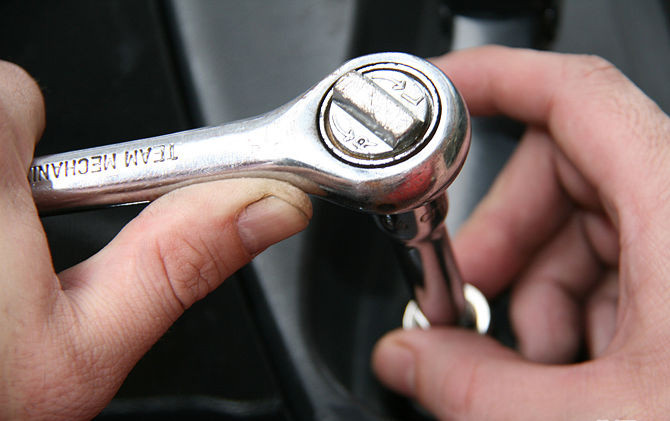
Place the socket and ratchet fully over the hex nut and hold in place with one hand.
Twist the ratchet to spin the hex nut CCW one half to one full turn.
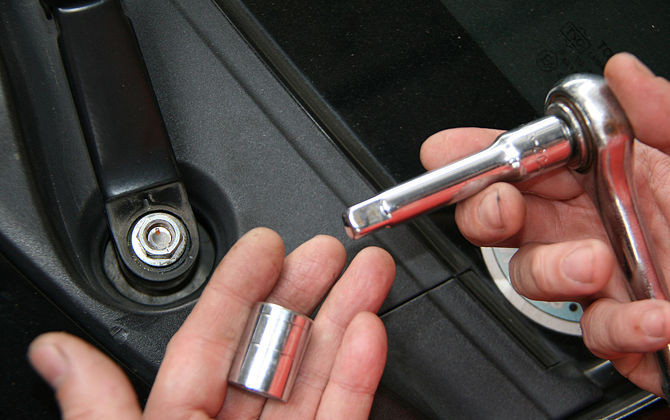
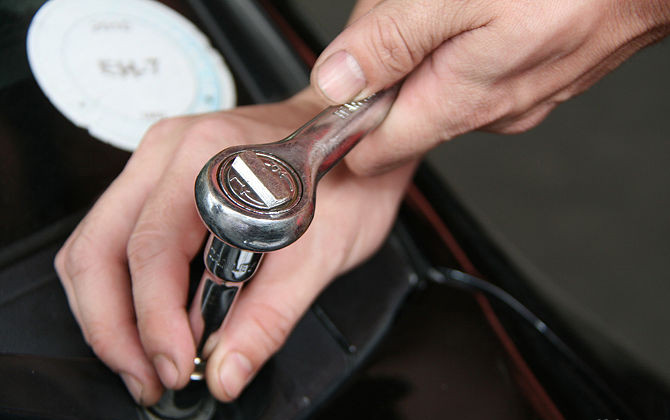
After the hex nut is loosened, release your grip of the wiper arm and remove the socket and ratchet from the hex nut.
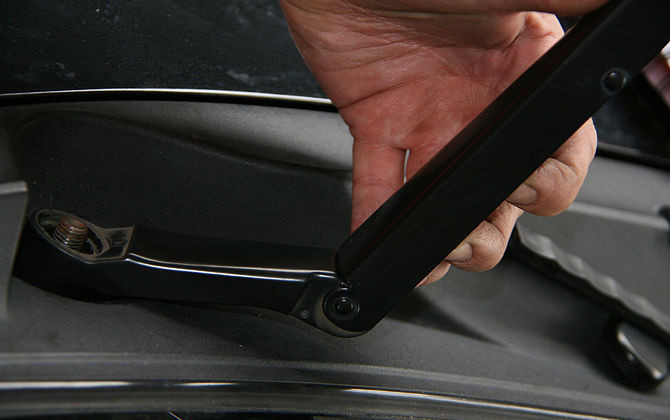
Spin the hex nut completely off by hand and set aside for reuse.
Lift the wiper blade up from the windshield with one hand and hold the point of attachment with the other.
Gently "rock" the wiper blade back and forth while lifting with both hands and remove from the drive post.
3.For the clip on type:
Follow the wiper arm away from the wiper blade to it's base or point of attachment.
This may require that the hood be opened.
Inspect the sides of base closest to the bottom for a flange or lip.
Insert the tip of a medium (1/4" or so) size straight blade screwdriver between the base and flange or lip.
Place a piece of cardboard or shop rag between the screwdriver and base to protect the finish if desired.
Twist or pry the screwdriver so that the space between the flange or lip and the base increases.
Enlarge this space to maximum (1/4" - 3/8") with screwdriver, pliers or hand.
Lift the wiper blade up from the windshield with one hand and hold the point of attachment with the other.
Gently "rock" the wiper blade back and forth while lifting with both hands and remove from the drive post.
Increase the space between the flange or lip and base if needed to allow removal of the wiper arm from drive post.
4.For types without a clip or bolt:
Locate the hinge very close to the wiper arm point of attachment.
Locate a hole on each side of the arm near the hinge pin.
Lift the wiper arm fully up and off the windshield.
Slide a finish nail or other small diameter steel (or other rugged material) pin in one of the holes until it become visible on the other side.
You may need to slightly rock the wiper blade closer to / further away from the windshield while attempting to slip the nail into the hole fully.
Release the wiper arm - it should remain away from the windshield surface - resting on the finish nail.
Rock the wiper arm up and down by grasping with both hands - one hand on the arm and the other pulling at the point of attachment until the arm slides off the post.
5.Clean the drive post if needed with a small wire brush. Some posts have ridges designed to "cut" into the soft metal of the wiper arm to maintain the arm orientation. Clogged valleys between the ridges prevents the cutting action, and can cause early failure of the wiper arm. Remove any rust and debris from threaded posts with a wire brush. Apply a drop or two of oil (or other light lubricant) on post threads prior to reinstalling wiper arm.
6.Install replacement wiper arms in reverse order of the above procedure. Align the blade with the mark on the windshield in the first step. If the arm was loose on the post, run the wiper at slow speed until it has turned the post or other wiper to the lowest point on the windshield. Place the replacement wiper arm on the post so that the wiper is resting at the low point of the windshield. Seat the wiper arm point of attachment fully on the post by gently tapping on top. The clip on type wiper arm is secured by seating the base fully on the drive post and squeezing or tapping the lip or flange against the base.